
Chamclad installation is a crucial aspect of construction projects, offering a versatile solution for wall paneling needs. In this detailed guide, we will explore the ins and outs of ChamClad installation, from its benefits to the step-by-step process and maintenance tips.
Get ready to dive into the world of ChamClad and discover how it can transform your space with ease and elegance.
As we delve deeper into the specifics of ChamClad installation, you'll gain a comprehensive understanding of this innovative construction material and how it can elevate the aesthetic appeal of any environment.
Introduction to ChamClad Installation
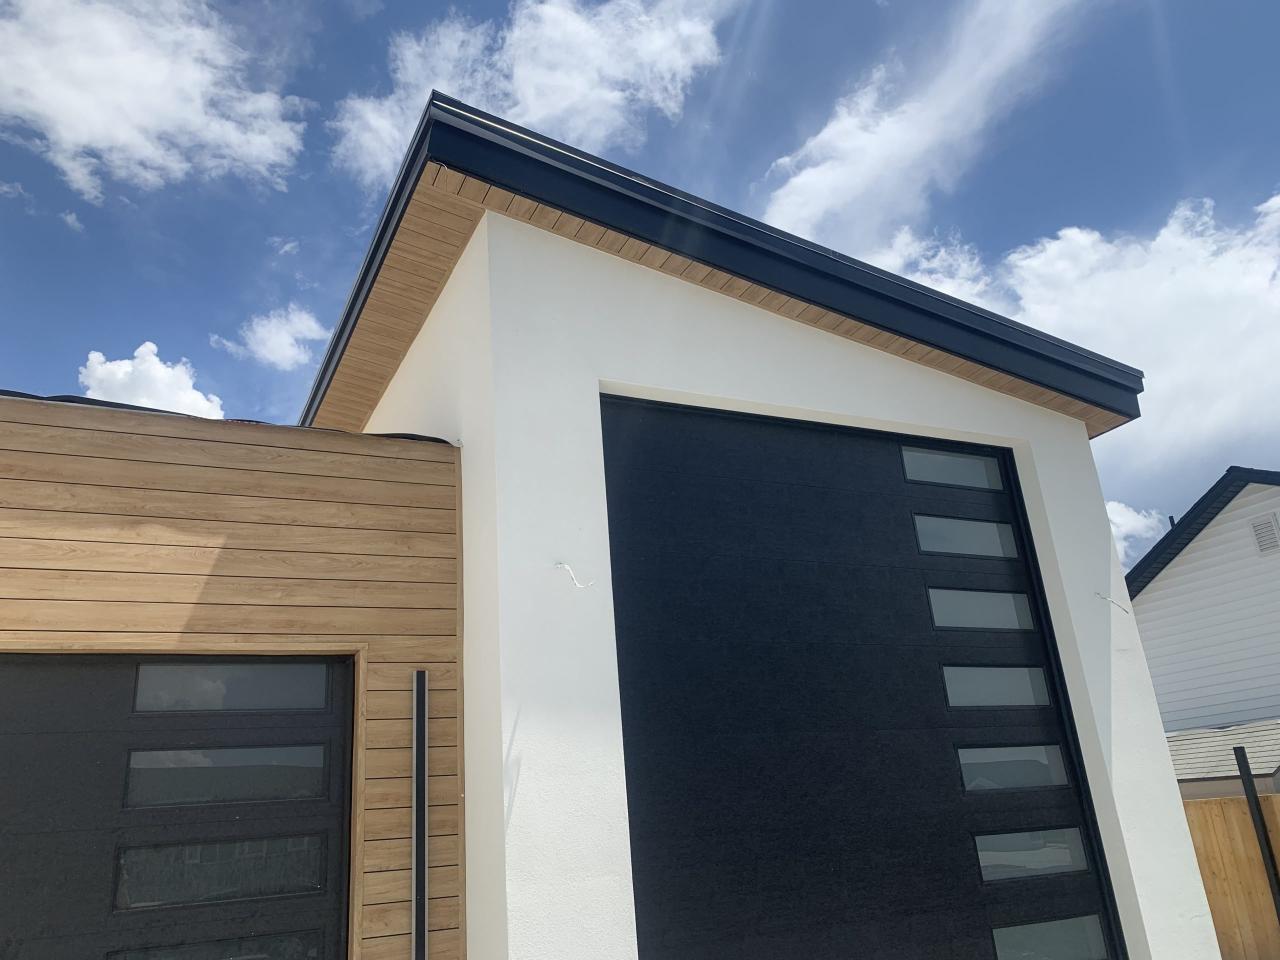
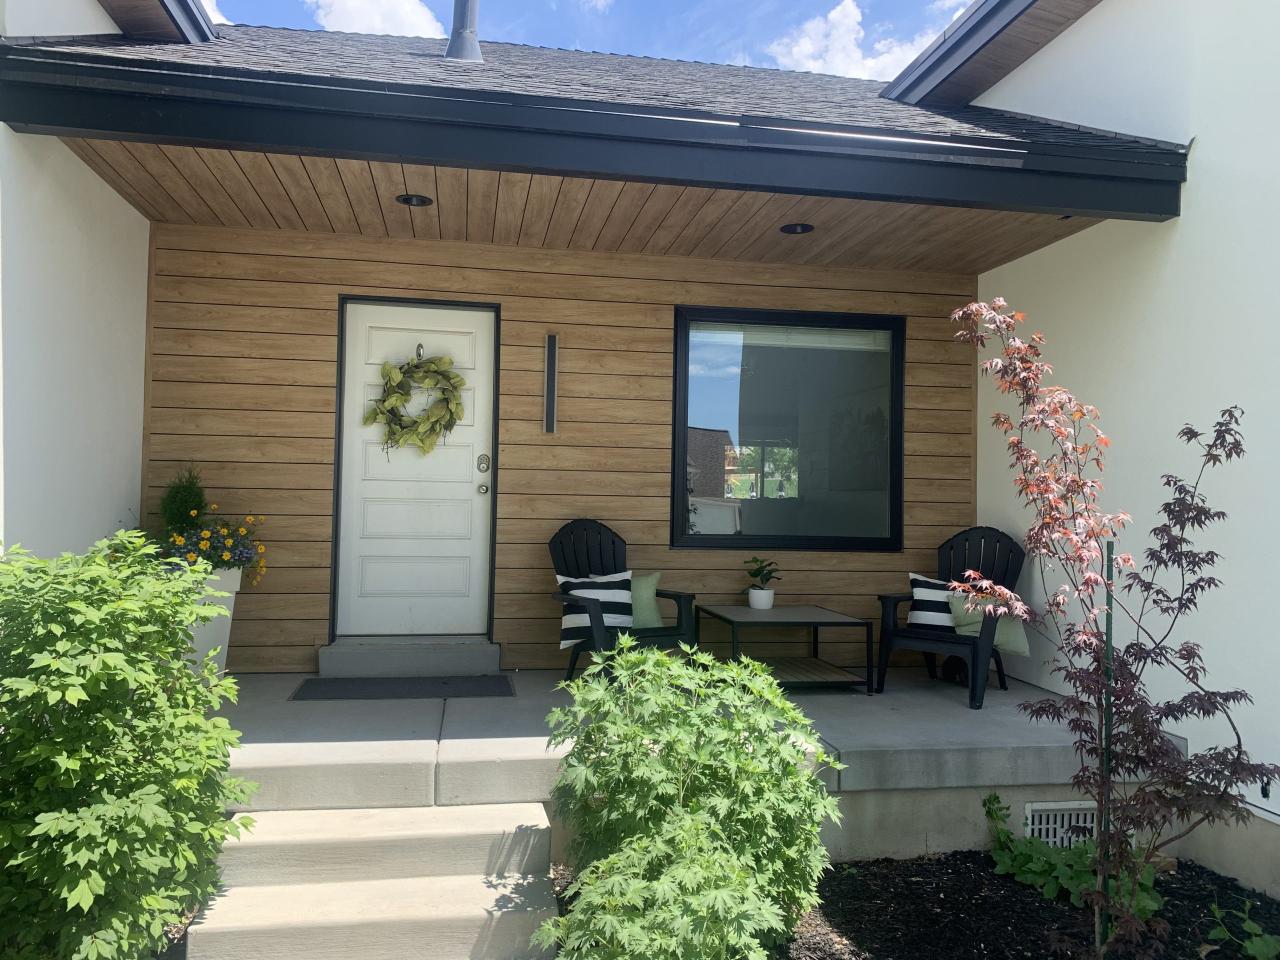
ChamClad is a versatile and innovative solution for wall paneling in construction projects. It is designed to enhance the aesthetic appeal of interior and exterior spaces while providing durability and ease of installation.
Benefits of Using ChamClad
- Enhanced aesthetic appeal: ChamClad offers a wide range of styles and finishes to suit various design preferences, adding a modern touch to any space.
- Durability: ChamClad is made from high-quality materials that are resistant to wear and tear, ensuring long-lasting performance.
- Easy installation: ChamClad panels are designed for simple and efficient installation, saving time and labor costs during the construction process.
- Low maintenance: ChamClad requires minimal upkeep, making it a practical choice for busy commercial or residential settings.
Types and Styles of ChamClad
ChamClad offers a diverse range of options to suit different design needs and preferences. Some of the popular types and styles include:
- Wood-look panels: Mimicking the appearance of natural wood, these panels add warmth and texture to interior spaces.
- Metallic finish panels: These panels offer a contemporary look with a sleek and modern appearance, perfect for industrial or modern design schemes.
- Brick-look panels: Ideal for creating a rustic or urban vibe, these panels provide the look of exposed brick without the need for actual masonry work.
Pre-Installation Preparation
Before starting the ChamClad installation process, it is crucial to prepare adequately to ensure a smooth and successful installation. This includes gathering the necessary tools and materials, measuring and planning, and preparing the wall surface.
Necessary Tools and Materials
- ChamClad panels
- Adhesive
- Screws
- Tape measure
- Pencil
- Level
- Saw
- Protective gear (gloves, goggles)
Measuring and Planning
Before starting the installation, it is essential to measure the wall accurately and plan the layout of the ChamClad panels. This ensures that the panels fit correctly and that there is a balanced design on the wall. Use a tape measure, pencil, and level to mark where each panel will go.
Preparing the Wall Surface
Prior to installing ChamClad panels, the wall surface must be clean, dry, and free of any debris. Remove any existing wallpaper, paint, or other coverings. Repair any cracks or holes in the wall and ensure that it is smooth and even.
This will provide a suitable base for the ChamClad installation and help the panels adhere properly.
Installation Process
Installing ChamClad on a wall requires careful attention to detail and precision. Below is a step-by-step guide to help you navigate through the installation process smoothly.
Step 1: Measure and Plan
Before starting the installation, measure the wall area where you will be installing ChamClad. Plan the layout to ensure a symmetrical and visually appealing result.
Step 2: Prepare the Wall Surface
Ensure the wall surface is clean, smooth, and dry before installing ChamClad. Remove any existing wallpaper or paint that may hinder the adhesion of the panels
Step 3: Apply Adhesive
Using a suitable adhesive recommended for ChamClad, apply it evenly on the back of each panel. Make sure to follow the manufacturer's instructions for the adhesive application.
Step 4: Install the Panels
Starting from one corner, gently press the first ChamClad panel onto the wall surface. Use a level to ensure the panel is straight. Continue adding panels, interlocking them securely for a seamless look.
Step 5: Trim and Finish
If needed, trim the panels to fit around obstacles like outlets or corners. Use a sharp utility knife for precise cuts. Finish the installation by ensuring all panels are securely in place.
Step 6: Enjoy Your New ChamClad Wall!
Once the installation is complete, step back and admire your newly transformed wall with ChamClad. Enjoy the modern and stylish look it brings to your space.
Finishing Touches and Maintenance
After completing the installation of ChamClad panels, it's important to focus on the finishing touches and maintenance to ensure a polished look and prolong the lifespan of your walls.
Edging and Corner Finishing
When finishing the edges and corners of ChamClad panels, it's essential to use matching corner pieces for a seamless transition. These pieces are designed to provide a clean and polished look, ensuring that the edges and corners are protected and visually appealing.
Cleaning and Maintenance Practices
- Regularly dust off the ChamClad panels with a soft cloth or duster to prevent the buildup of dirt and grime.
- For deeper cleaning, use a mild soap solution and a soft sponge to gently clean the panels. Avoid using abrasive cleaners that can damage the surface.
- Inspect the panels periodically for any signs of damage or wear, and address any issues promptly to prevent further damage.
- Ensure proper ventilation in the room to prevent moisture buildup, which can lead to mold or mildew on the ChamClad panels.
Troubleshooting Common Issues
- If you notice any gaps between panels, use a small amount of adhesive to secure them in place and maintain a uniform appearance.
- In case of scratches or scuffs, consider using a touch-up paint kit provided by the manufacturer to cover up any imperfections.
- If there are issues with panel alignment, gently adjust the panels to ensure they are properly aligned and level for a cohesive look.
- If you encounter any issues beyond your expertise, consult a professional installer to assess and address the problem effectively.
Concluding Remarks
In conclusion, ChamClad installation offers a seamless way to enhance the look and functionality of your walls. By following the guidelines Artikeld in this guide, you'll be well-equipped to tackle your next installation project with confidence and precision. Embrace the versatility of ChamClad and unlock the potential to create stunning spaces that leave a lasting impression.
General Inquiries
What are the benefits of using ChamClad for wall paneling?
ChamClad offers durability, easy installation, and a wide range of styles to choose from, making it a versatile choice for wall paneling projects.
What tools and materials are needed for ChamClad installation?
Some essential tools include a saw, level, adhesive, and measuring tape. Materials like ChamClad panels and corner pieces are also required.
How can I work around obstacles like outlets or corners during ChamClad installation?
You can use specialized tools like a jigsaw to cut panels to fit around obstacles, ensuring a seamless installation.
What maintenance practices can prolong the lifespan of ChamClad?
Regular cleaning with a mild detergent and soft cloth, as well as avoiding harsh chemicals, can help maintain the appearance and longevity of ChamClad.
How can I troubleshoot common issues that may arise after ChamClad installation?
If issues like warping or loose panels occur, carefully remove the affected area and re-install using proper tools and techniques to ensure a secure fit.